Register Administrative Objects
From the global toolbar, click .
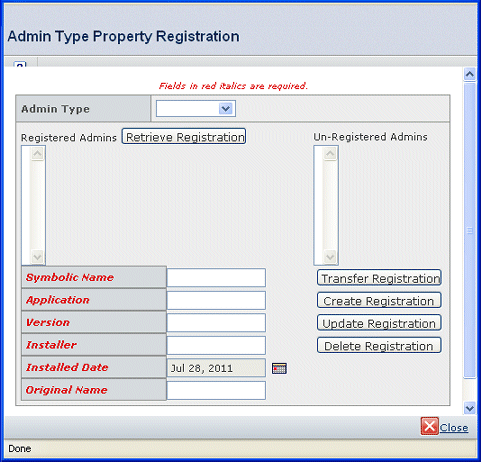
From the Admin Type list, choose the needed type
of administrative object.
For example, to add a type called SubType, choose type from the Admin
Type list.
From the Un-Registered Admins list, choose the
needed object.
Do not register schema that you anticipate to be in an upcoming release
without explicit permission from ENOVIA Engineering. They must provide
you with the registration information for the application and version
properties. If you have not received instructions from ENOVIA Engineering,
do not enter "ENOVIAEngineering" for the installer property in any schema
that you register.
Enter values for the properties as needed. If you are using ENOVIA Business Process Services's convention for symbolic names, use the format [administrative
type]_[object name with no spaces].
- When entering the version number, use dashes as separators, not periods.
Correct: 10-6-0-1
Incorrect: 10.6.0.1
The version specified must be a valid SchemaInstaller version. You
can find the list of valid schema versions in the AppInfo.rul files in
this directory:
<ENOVIA_INSTALL>/studio/Apps/SchemaInstaller/<version>/SchemaInstaller
- When entering symbolic names for custom administrative objects,
do not use the exact same naming convention as ENOVIA Business Process Services
uses unless you are working closely with Engineering Central.
You can use a slight variation of the naming convention, such as adding
an abbreviation for your company's name. For example, instead of type_Part,
a company with the abbreviation ACM could add type_ACMPart.
Click Create Registration.
The properties are saved and the object is moved to the Registered Admins
list.
Before using the administrative object, especially a store, within an
ENOVIA product, restart the application server.

Remove a Registration
From the global toolbar, click.
From the Admin Type list, choose the needed type
of administrative object.
From the Registered Admins list, choose the needed
object.
Click Delete Registration.
The object is moved to the Un-Registered Admins list and all properties
for the object are deleted.
Update Administrative Object Properties
From the global toolbar, click.
Do not update properties for objects that are part of ENOVIA Business Process Services(properties attached to the registration program eServiceSchemaVariableMapping.tcl).
From the Admin Type list, choose the needed type
of administrative object.
From the Registered Admins list, choose the needed
object.
Click Retrieve Registration.
Edit values for the properties as needed.
Click Update Registration.
Before using the administrative object within an ENOVIA product, restart
the application server.
|
 > Utilities > Property Registration > Admin Type .