In the Global toolbar,
select Create  > Product Data > Create Product Line. > Product Data > Create Product Line.
Or List the Product Lines in the system (for more information, see List View of the Product Lines) and in the page toolbar, click Create. The
Create New Product Line
page appears.
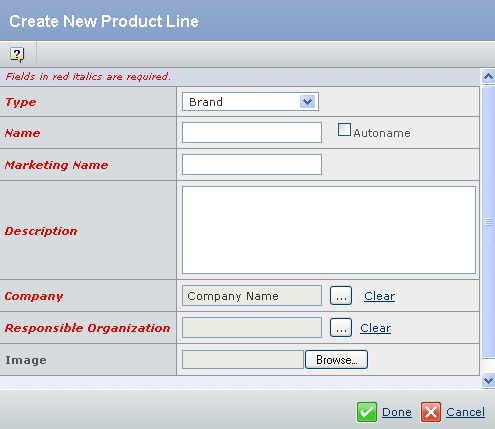
Enter the following details about the Product Line.
Fields in red and italics are mandatory attributes. - Select a type from the Type list. By default, Brand is selected. You can select Sub-brand, Commercial Variant and Segment from the list.
- In the Name box, type the Name of the new Product Line.
You can also select Autoname check box to assign a name automatically to this Product Line. The autonames are of the format PL-nnn, where nnn represents a sequential number.
- The Marketing Name box is automatically populated with the same value as the Name field.
You can accept the default or specify a different name. This name appears when configuring the product or when displaying all the Product Lines for a specific company. Note:
You have to fill the Marketing Name attribute if the Autoname is selected for Name attribute.
- The Description box is automatically populated with the same value as Marketing Name.
If you change the Marketing Name, the system will change the Description as Marketing Name. This happens only if the text in the Description box is same as that in the Marketing Name box.
- Click
 corresponding to the Company, to assign a Company or business unit to the new Product Line. corresponding to the Company, to assign a Company or business unit to the new Product Line.By default, the Company Name is set as your company.
- Click corresponding to the Responsible Organization, to assign an organization or project that has design responsibility for the Product Line.
- Click Browse to select an Image for the Product Line.
Click Done.
The Product Line gets created.
|