To open the create form, perform one of these procedures:
- From the global toolbar, click .
Or: - View the Issue PowerView page. See Viewing an Issue in PowerView.
- Click the Resolved By tab.
- Click .
Or: - View the Properties page for the Product. See the Product Line Management User's Guide.
- From the page toolbar, click .
 For details on using the search page that opens by clicking an ellipsis button, see Searching. Some fields are filled in based on where you created the Defect. For example, if you created the Defect from the Product's Properties page, that Product shows in the Reported Against Product field.
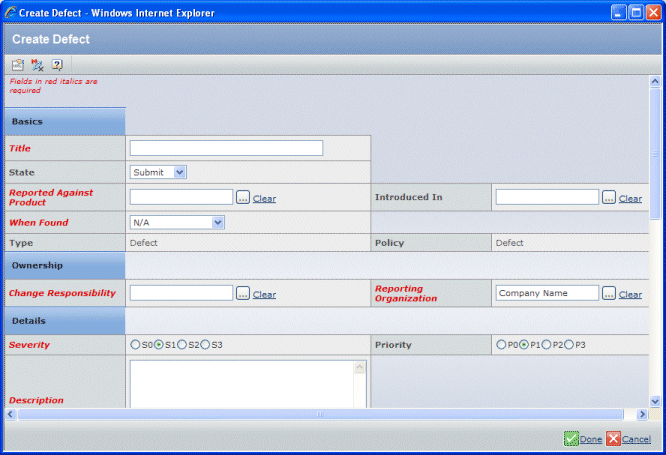
Enter these details: Basics - Title. Enter a title that briefly defines the defect.
- State. Choose an option:
- Submit. You still need to gather additional details for the defect, but you want to enter the information you currently have.
- Evaluate. You will enter all the needed details and the Defect is ready for assessment once you click Done.
- Reported Against Product. Click the ellipsis button to search for and select the Product that the Defect affects. If you started this procedure from a Product's properties page or from an Issue, the relevant Product is automatically listed here.
- Introduced In. Click the ellipsis button to select the Product revision where the defect was first found.
- When Found. Select an option from the drop-down menu to indicate the stage of the product development process where the Defect was discovered:
- Development
- First Pass Test
- Second Pass Test
- Final Qualification
- After Release
- N/A
- Type. For information only: shows the ENOVIA object type used to save the Defect; cannot be changed.
- Policy. For information only: shows the ENOVIA policy used to govern the Defect; cannot be changed.
Ownership - Change Responsibility. By default, shows the organization with the Design Responsibility for the Product or the parent Model of the Product. Click the ellipsis button to select a different organization responsible for resolving the defect.
- Reporting Organization. By default, shows the organization associated with you (the person reporting the Defect). Click the ellipsis button to select a different organization.
Details - Severity. Click the option that indicates how severe the Defect is, where S0 is a showstopper and S3 is the least severe.
- Priority. Click the option that indicates the priority for fixing this Defect, where P0 means the highest priority and P3 is the lowest priority.
- Description. Enter a detailed description of the Defect.
- Steps to Reproduce. Enter a step-by-step procedure showing exactly how to reproduce the Defect.
- Environment. Click the ellipsis button to select the environment (client and server operating systems, browsers, and so on) in use when the Defect was discovered.
Summary - Regression. Click Yes or No.
- Regression From. If Regression is Yes, click the ellipsis button to select the Product revision where the feature last worked.
- Regression Details. Enter a detailed description of the change that broke the relevant feature.
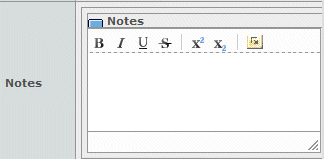
- Notes. Use this field to enter discussion notes about the Defect.

- Subscribers. Click the ellipsis button to select people who should be notified whenever a change is made to this Defect.
- Keywords. Enter a list of terms relevant to this Defect that people can use when searching for Defects.
Click Done.
|