Searching for Issues | ||
| ||
From the global Actions menu, select
 > Defect Management > Create Defect from Issue.

Enter criteria for any of these attributes; you can use wildcards and enter multiple values (separated by commas) in any text field:
Type. If your company has defined subtypes of Issues, click the ellipsis button and select the needed type. If you change the type, the values available for the Policy field are updated to list only those policies that support the selected type.
Owner. Enter the name of the person who owns the Issue, or click the ellipsis button to select that person.
Originator. Enter the name of the person who created the Issue, or click the ellipsis button to select that person.
Title. Enter the title of the Issue.
Name. Enter the name of the Issue.
Policy. To select a specific policy:
- Click the ellipsis button. Multiple policies show in the list only if your installation has defined additional policies. As installed, only the Issue policy shows.
- Click the needed policy.
- Click
 . If you change the policy, the values available for the Current field are updated to list the states in the selected policy.
Vault. Click to specify the vault in which to search.
Description. Enter all or part (using wildcards) of the text in the description field.
Revision. Enter a specific revision level, or check the needed box:
- Highest. Searches for the most current revision of the Issue.
- By State. Searches for the current revision in the selected state.
State. Restricts the search to Issues in a specific lifecycle state.
Note: The State shows as !Closed (Not Closed, or, any state other than closed) because you cannot create a Defect if the Issue has already been closed.
Originated. To search for Issues created within a specified time frame:
- Click the ellipsis button.
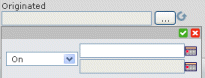
- Click .
Modified. Click the ellipsis button to specify the date range to search for Issues modified within a specific date range. This field works the same as Originated.