Fields Arranged in a Table | ||
| ||
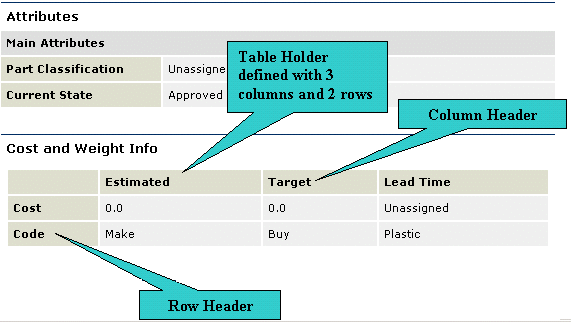
To arrange fields in a table, add a dummy field above the fields you want to include in the table. Define the dummy field using Field Type=Table Holder. It does not appear on the form. Using the Field Table Columns and Field Table Rows settings, you specify the number of columns and rows and their headings.
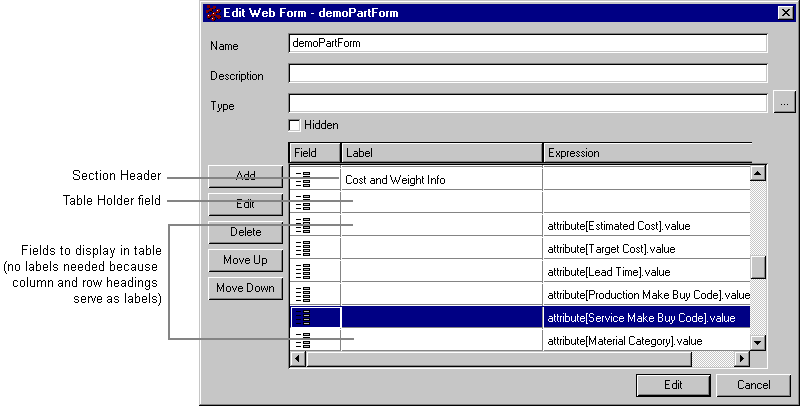
The system uses the first fields under the Table Holder field to populate the table. For example, if the settings specify 3 columns and 2 rows, the table contains 6 cells. Therefore, the system uses the first 6 fields under the Table Holder to populate the cells, working from upper left to lower right (the first field under the Table Holder is placed in the upper left cell, the second field is in the upper middle cell, and so on). After adding the Table Holder field, make sure the fields under it in the web form are the ones you want in the table and are in the correct order. The fields in a table do not need labels defined for them because the column and row headings server as labels.

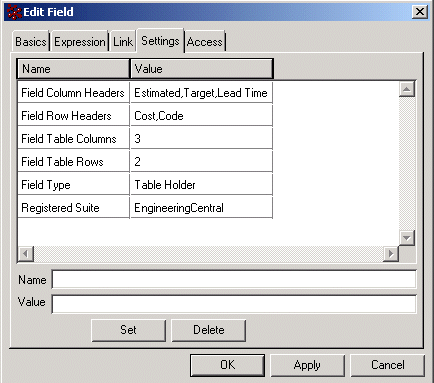
To configure a form to arrange fields in columns and rows, define a Table Holder field using these settings
- Field Type = Table Holder
- Field Column Headers = Label for each column header, separated by a comma
- Field Row Headers = Label for each row header, separated by a comma
- Field Table Columns = 2, 3, ...
- Field Table Rows = 1, 2, 3, ...
This dialog box shows the settings to configure a field to serve as a table holder.

The row and column headers can also be string property keys. If a user does not have access to a field, then the table shows that cell as empty.
Make sure the fields under the Table Holder in the web form are the ones you want in the table. This dialog box shows how to configure a web form to display fields in a tabular format.
