Advanced Tab Reference Information | ||
| ||
Advanced Tab Functionalities
The Advanced tab is located in the toolbar and should only be used when authoring P&O data in Enterprise mode:
Click the Advanced tab to access the following toolbar:
The following table summarizes the objects that you can create and query:
| Tab | Object | Description |
|---|---|---|
| People | Person | Create, update and query persons |
| Context | Create and query security contexts. Note: the context cannot be updated (e.g. you cannot update the list of assignees). |
|
| Organization | Create, update and query organizations | |
| Project | Create, update and query projects | |
| Role | Create and query roles | |
| Resources | N/A | N/A |
| Accesses | Policies | Query policies |
| Rules | Display the current rule (there can only be one) | |
| Commands | Query commands | |
| Masks | Query masks | |
| Check Access | Query TNR access | |
| Model | Type | Query types and report associated policies |
| Relationship | Display relationship associated to rule (there can only be one) |
![]()
Common User Interface Commands and Techniques
The Advanced tab uses a set of common commands and techniques:
| Tab | Description |
|---|---|
| Search command | |
| New command | |
| Update command |
About the Search... Command
In the query criteria panel (Search mode), when searching Persons, you can enter criteria, using (or not) the “*” wildcard (for any group of characters). If no criteria is entered, “all” is assumed (equivalent to a single "*" criterion).
For all other objects, you have to enter the “*” wildcard to be able to search.
Click the ![]() button to perform the query.
button to perform the query.
When it is possible to select an object in the result list, it should appear below the query/result panel.
About the New... Command
When all necessary fields are filled in the creation panel, click the ![]() button to create the object.
button to create the object.
Creation mode is self-explanatory. Select the tab for the appropriate object, fill in the fields, then click the ![]() button to create the object. Mandatory fields are indicated like this: (*) Required.
button to create the object. Mandatory fields are indicated like this: (*) Required.
![]()
Authoring P and O data
You can switch between creation and query modes by toggling the New... and Search... commands. The default mode is the search mode.
Managing Persons
Click the Person tab and search for persons via personal or address information. For example, enter “*” in the User ID field and click the ![]() button:
button: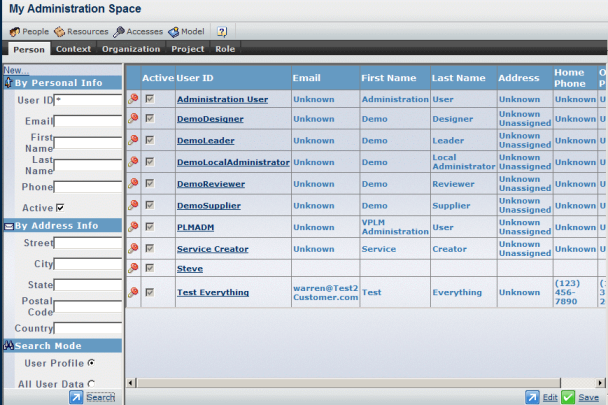
Selecting the person displays the person’s profile: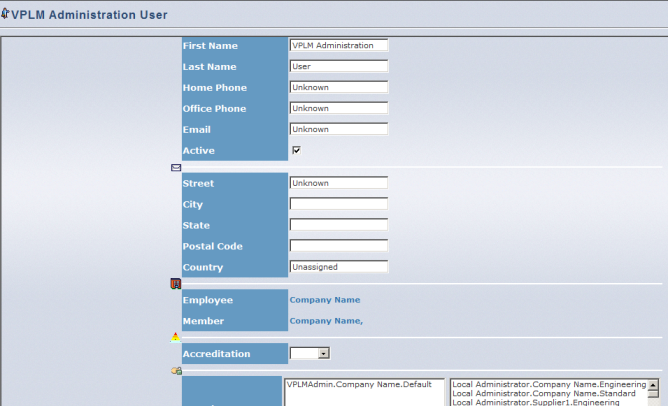
In this mode, the following user information can be modified:
- First Name
- Last Name
- Phone
- Security Contexts (you can assign the person to another context by selecting the context and clicking the left arrow)
- Address (Street, City, State, Postal Code, Country).
Click another tab, then the Person tab again and select the New... command to create persons: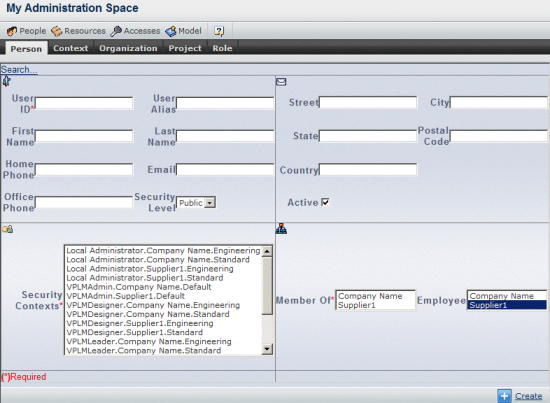
When creating a person, provide a userid and e-mail address, and assign the person to a security context and organization. The password of the person created is the same as the PLM_ExternalID.
Note it is still possible to change the search criteria on the left side, and reapply the query.
Managing Contexts
Click the Context tab and search for contexts via the context name. For example, enter “*” in the Name field and click the ![]() button:
button: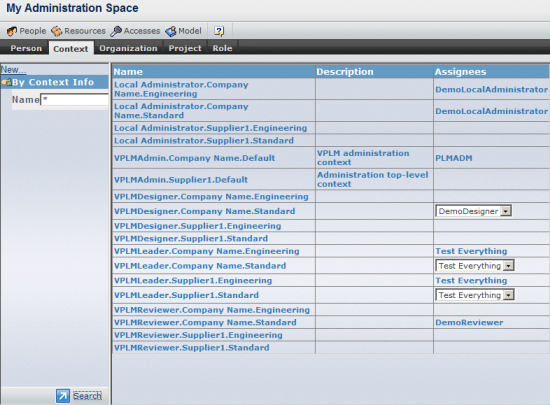
No context information can be updated in this way. As a consequence, no context can be selected.
Click another tab, then the Context tab again and select the New... command to create contexts: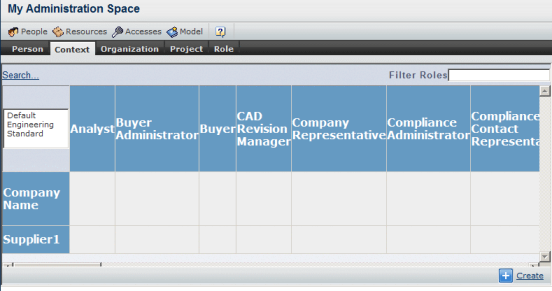
The context creation dialog box contains a matrix:
- all available roles (for both CBP and rich client applications for your server) are displayed in the top row; because the list is long, you can use the filter provided to limit the number of roles displayed
- all available organizations are displayed in the column to the left
- all available projects are displayed in the top left cell.
To create a context, select a project first. Cells highlighted in red correspond to an existing security context for the selected project and cannot be deselected: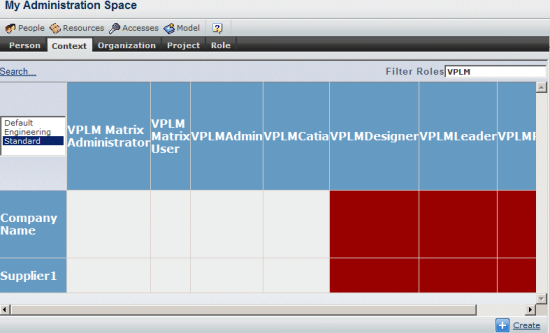
Select the desired project then select an empty cell in the table. The new context to be created in that project will be highlighted in blue (and can be deselected):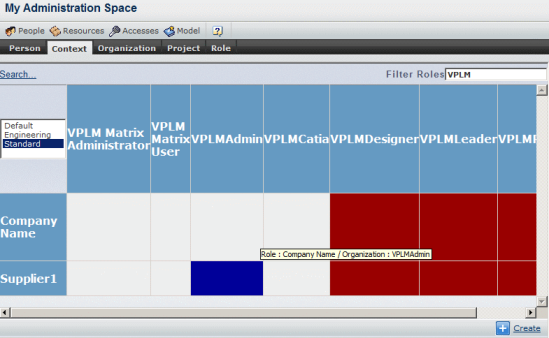
Click the ![]() button to create the context.
button to create the context.
Managing Organizations
Click the Organization tab and search for organizations via the organization name. For example, enter “*” in the Name field and click the ![]() button:
button:
Selecting an organization displays it in the tree on the left. Select it again to display its attributes.
You can modify organization attributes such as the address (street, city, state, postal code, country).
Click another tab, then the Organization tab again and select the New... command to create organizations: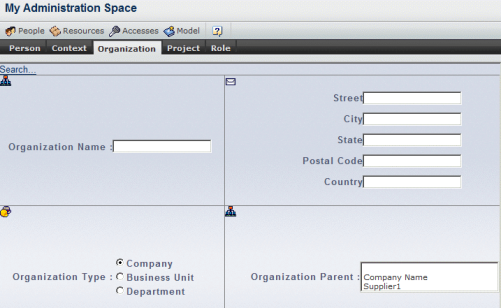
The Organization Type may be one of:
- Company
- Business Unit
- Department.
One parent organization may be chosen.
Click the ![]() button to create the organization.
button to create the organization.
Managing Projects
Click the Project tab and search for projects via the organization name. For example, enter “*” in the Name field and click the ![]() button:
button: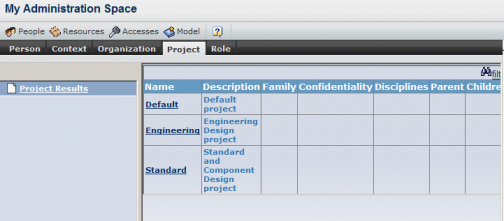
Selecting a project displays it in the tree on the left. Select it again to display its attributes: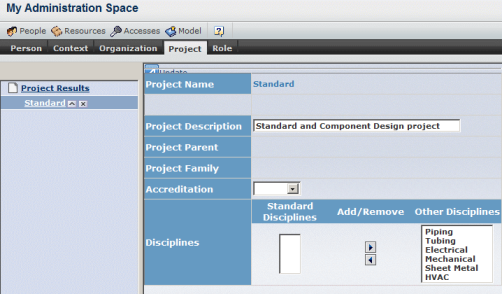
Click another tab, then the Project tab again and select the New... command to create projects:
Enter the project name, description and accreditation, and choose a parent project, family and discipline.
Click the ![]() button to create the project.
button to create the project.
Managing Roles
Click the Role tab and search for roles via the role name. For example, enter “*” in the Name field and click the ![]() button:
button: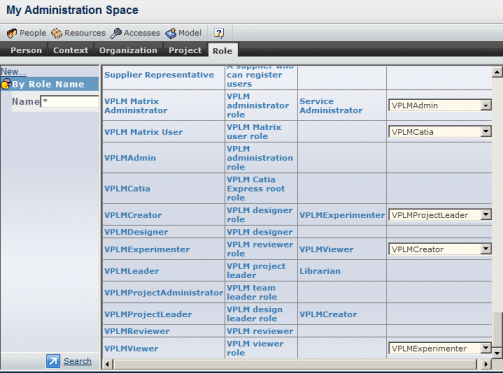
Roles cannot be modified. You can only browse information about roles.
Click another tab, then the Role tab again and select the New... command to create roles:
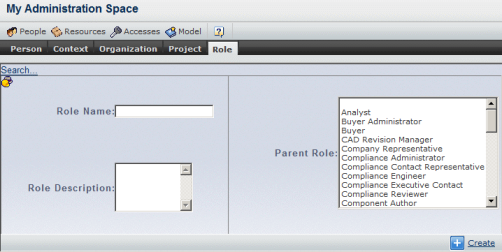
Enter the role name and description and choose a parent role. Whereas it is possible for CBP applications to have several parent roles per role, it is not possible to select several here.
Click the ![]() button to create the role.
button to create the role.
Note: roles cannot be updated.
![]()
Querying Accesses
This function allows you to:
- browse policies
- browse rules
- browse commands
- browse masks
- check access to TNR (type, name, revision of business objects).
It is similar to the My Profile command, except that the information generated is detailed information about the objects themselves.
Once you have used the My Profile command, querying accesses is self-explanatory.