Managing Projects | |||
| |||
Search for Projects
This task explains how to search for projects.
Select the Project command.
The Search tab is activated:
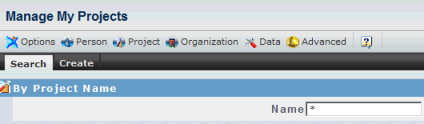
Search for projects. For example, enter * in the Name field and click the
 button to display a list of all the projects in the database.
The search results are displayed like this:
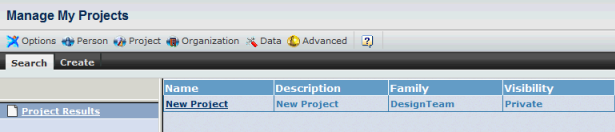
Click the project name in the tree explorer.
If you selected the project New Project, for example, the result looks like this:
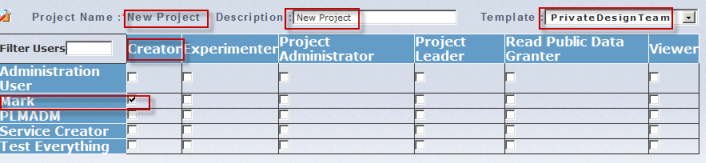
Click the Update command next to the
 button to update the project.
![]()
Create Projects
This task explains how to create projects.
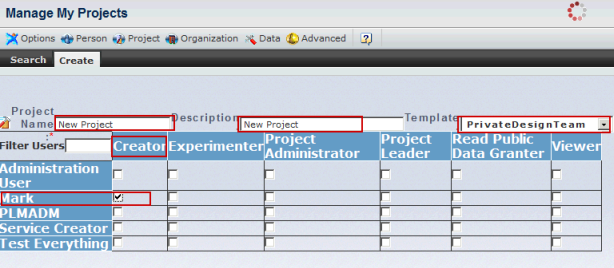
Click the Create tab.
The following dialog box is displayed:

Enter a project name and project description, select the parent project template, and assign a user and role by checking the appropriate checkboxes:
Click the Create command next to the
 button to create the project.
The message:
Project has been created
is displayed to confirm the creation was successful.
As a result, the following security context has been created:
VPLMCreator.My Company.New Project