Log onto the ENOVIA V6 web administration user interface.
Click the 3DS icon at the top left to display the My Profile command.
Click My Profile in the tree explorer to display the tree nodes.
Expand the Preferences sub-node and select Security Context.
This displays the list of security contexts to which you are assigned, enabling you to select your preferred security context:
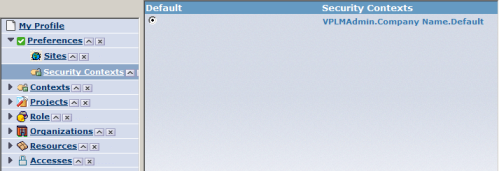
If no default context is defined at the first connexion, you will not have any radio button selected. If you select one and click the Update button, on your second connexion (even dynamically) you will obtain a message and the context chosen will be selected.
Click the Update button.
If you selected a different context from a list, the new context immediately becomes the preferred context and is valid for your current session: you do not have to exit the web application and then log in again for the change to take effect.
Note:
No synchronization is performed between wintop and webtop applications. In other words, on the wintop side, the the end user will be prompted to select the default security context at logon. On the webtop side, users cannot choose the security context at logon.