Creating and Granting Customer-Defined Masks

You may want to create your own masks, for example by adapting the DEFAULT mask to a specific role such as a Designer.

This involves two steps:


  • creating the new mask
  • creating commands used for granting mask access.

Two kinds of command administration tools are available to create the commands and grant the masks:


  • an interactive tool: the Business administration console
  • a batch tool: MQL.

To be able to modify the access to masks grants (Commands), you must have at least the Business Administrator privilege.

This task shows you how to:

Creating User-Defined Masks

Let’s suppose you have a .metadata file defining modeller entities and their attributes that derive from PLMCORE metadata. For example: PLMProductDS.metadata.

You want to adapt the DEFAULT mask definition of the PLMProductDS modeller to designers to create a VPLMDesigner mask.

  1. Modify the mask file.

    First, copy PLMProductDS.mask file from:

    <ENOVIAPlatformServer_WEB-INF>/classes/vplm/mask/DEFAULT

    to the directory:

    <MyCustomization_root>/vplm/mask/VPLMDesigner directory

    If <MyCustomization_root> is not:

    <ENOVIAPlatformServer_WEB-INF>/classes

    this directory must be specified to the mask compiler using the -addpath option; otherwise, it is useless.

    Then, edit the PLMProductDS.mask file to meet your requirements:


    • modify accesses
    • replace MASK DEFAULT by MASK VPLMDesigner.

  2. Compile the mask file.

    Compile the mask file as follows:

    PLMPosMaskCompiler -m VPLMDesigner -d /tmp/masks -html /tmp/masks/html -addpath <MyCustomization_root>

    Expected results:


    • the VPLMDesigner.SecurityMask file has been generated in directory /tmp/masks, as well as the result.log file
    • html files have been generated in /tmp/masks/html.

    The modellers index file is_index.html and lists all processed modellers and the number of errors.

  3. Deploy the mask file.

    With write access on the server runtime view, copy your VPLMDesigner.SecurityMask file from /tmp/masks to:

    <apache_root>/webapps/ematrix/WEB-INF/classes/vplm/mask

    The masks then has to be granted.

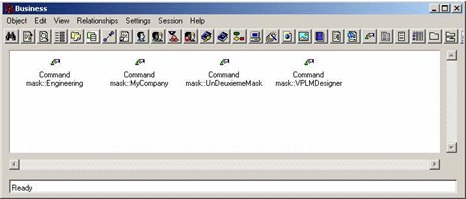
Granting the Masks Using the Business Administration Console

User-defined masks can only be granted by an ENOVIA V6 server-side command whose name is the mask name prefixed by:

mask::

Once connected to the console, VPLM commands can be retrieved and selected:


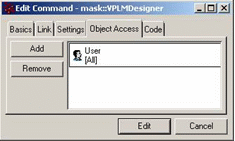
Their access can be modified according to your needs by adding/removing:


  • P&O contexts, projects, roles or organizations (warning: all are stored as roles)
  • Persons.

Their access can be modified in the Object Access tab of the Command editor, for instance, if you want to grant a VPLMDesigner mask to the context: ctx::VPLMDesigner.MyCompany.Engineering

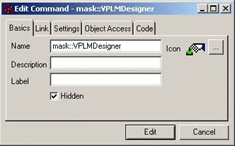
  1. Create then edit the command mask::VPLMDesigner:


  2. Remove the default access given to [All]:


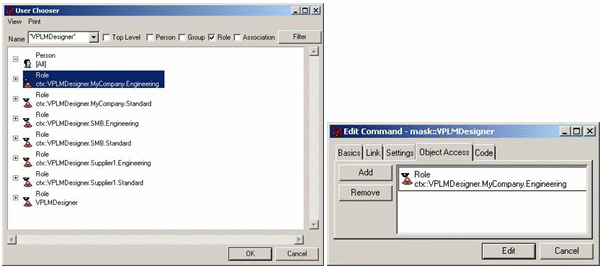
  3. Add access to the P&O objects you need to grant.

    In our example, this is the context:

    ctx::VPLMDesigner.MyCompany.Engineering


Granting the Masks Using MQL

As with the Business administration console, the mask grant accesses can be created or modified using the modify command order in an MQL script.

  1. If we take the Business administration console example, the equivalent creation script would be:

    add command mask::VPLMDesigner
    hidden
    user ctx::VPLMDesigner.MyCompany.Engineering;

  2. When modifying, take care to remove all previous granted accesses, if necessary.

    Example, if the mask was granted to role VPLMLeader:

    modify command mask::VPLMDesigner
    remove user VPLMLeader
    add user ctx::VPLMDesigner.MyCompany.Engineering;

    Be careful: the keyword user used in the modify command refers to the EV6 User.

    As a consequence:


    • remove user all is used to remove the person "all" (equivalent to public access)
    • add user ctx::VPLMDesigner.MyCompany.Engineering is used to add access to the role ctx::VPLMDesigner.MyCompany.Engineering, which is a P&O security context.

Limitations.

Limitation 1: Indicative UI rendering via HTML does not take into account CATNls files for attribute aliasing.

Limitation 2: Only masks granted on person, security context, and the first level of a security context's components (project, role, organization) are retrieved.

Suppose we have the following case:


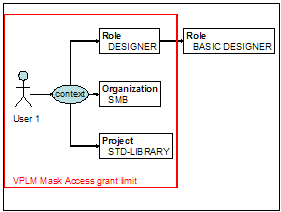
Access to a mask MYMASK may be granted to:


  • user1
  • DESIGNER.SMB.STD-LIBRARY context
  • DESIGNER role
  • SMB organization
  • STD-LIBRARY project

In these cases, User1 will use MYMASK (instead of DEFAULT).

But, it is useless to grant access to a mask to the BASIC-DESIGNER role, as this role is not directly connected to a context, ALTHOUGH it belongs to DESIGNER role's hierarchy.