Creating Sub Requirements or Derived Requirements | |||
| |||
Click a requirement or specification name, or click
 .
.
The Requirement Structure Browser or Specification Structure View page opens listing the selected object and any sub or derived requirements. The original object is the first one in the listing.
From the page Actions menu, select Create New > Sub Requirement.
Or
From the page Actions menu, select Create New > Derived Requirement .
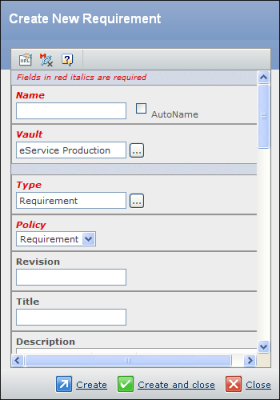
Enter these details for the new sub or derived requirement:
Type. Click
 to select a requirement
type or subtype.
to select a requirement
type or subtype.
Name. Enter a name, type a short descriptive string, or check AutoName. As you type, if a matching name appears in a drop-down list, you can click to select it.
Vault. Click
to select a vault. The
vault is where the object will be stored in the database.
Policy. From the drop-down list, select: Requirement.
Revision. The revision number or code.
Title. A descriptive identifier for the requirement.
Description. The description of the new requirements.
Owner. If you are not the owner, click
to search for and select
another owner.
Design Responsibility. Click
to search for and assign
design responsibility using Company or Projects data.
Priority. From the drop-down list, select: Pre-assigned, Medium, Low, High, or Urgent.
Difficulty. From the drop-down list, select: High, Medium, or Low. This is the estimated level of difficulty implementing this requirement.
Sponsoring Customer. Click
to select the customer
sponsoring this requirement.
Requirement Classification. From the drop-down list, select: None, Functional, Non-Functional, or Constraint.
Estimated Cost. The estimated cost to implement this requirement.
Requirement Category. The category for the requirement.
Synopsis. A summary of the requirement.
Notes. Any notes that may help others reviewing this requirement.
Target Specification or Chapter. (Requirement Structure Browser only) Assigns this sub requirement to a requirement specification or chapter. By default, the sub requirement is not assigned to any requirement specification.
Status.
Valid. This sub or derived requirement adheres to all rules.
Suspect. This sub or derived requirement needs additional work.
Decision. Click
to link a new or existing decision to this sub or derived requirement.
You can also set up and assign a decision to a Requirement to Requirement
relationship.