Using Toolbar Icons | ||
| ||
Clipboard
![]() Clipboard. Click to select
the option from the drop-down menu.
Clipboard. Click to select
the option from the drop-down menu.
- Add selected items to the clipboard collection. Adds checked selection(s) to clipboard.
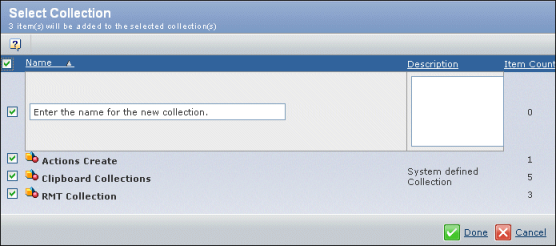
- New / Add to Collections. Displays this window for creating a new collection or adding to an existing collection.
![]()
View
![]() This icon indicates that the
default System Table view is active.
This icon indicates that the
default System Table view is active.
or
![]() This icon indicates a custom
view is active.
This icon indicates a custom
view is active.
From the drop-down menu, click to select an option.
- ViewName(s). Click to show the customized view.
- System Table. Click to show the default table view.
- Edit Current Table View. Click to change a custom table. The Customize Table View page appears.
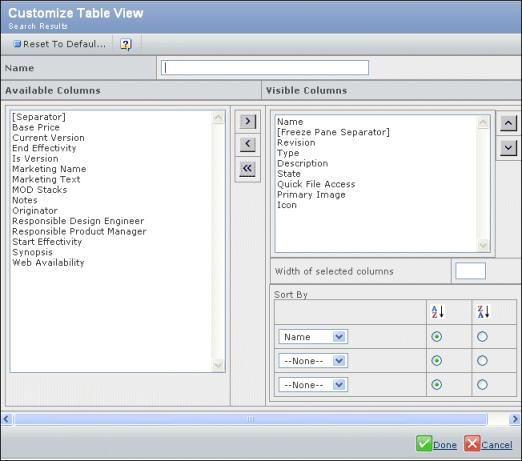
In the Name field, type an identifier for your table view. This is the name that appears in the Custom View drop-down menu.
Use the  (Add),
  (Remove), or
  (Remove All) icons to add or remove attributes from
the Visible columns.
(Remove All) icons to add or remove attributes from
the Visible columns.
Use the  (Move Up) and
 (Move Down) icons to
reorder the Visible columns.
(Move Down) icons to
reorder the Visible columns.
In the Width of selected columns field, type a the size in pixels.
Select the attributes by which you want to sort and their sort order. You can specify a primary, secondary, and tertiary sort order.
Click whether to list items in ![]() ascending or
ascending or
![]() desending order.
desending order.
Click Done to save your definitions. The work area refreshes with your table view and the table view name appears in the View drop-down menu.
The Edit option is available for custom table views only.
- Create New Table View. Defines a custom table. The Customize Table View page appears. See the previous Edit option for a description of this page.
- Delete Current Table View. Deletes the current custom table view. The page refreshes with the next available view.
The Delete option is available for custom table views only.
![]()
Compare
![]() This icon compares content of objects to identify
differences. For example, you can check specifications in the listing
and click Compare. Use the first form to Select
Object for Basis of Comparison. Click Next and
Select the Attribute to Compare. Click Next to
view the results.
This icon compares content of objects to identify
differences. For example, you can check specifications in the listing
and click Compare. Use the first form to Select
Object for Basis of Comparison. Click Next and
Select the Attribute to Compare. Click Next to
view the results.
![]()
Export
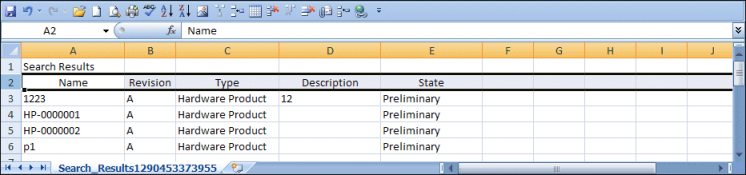
![]() This icon is used to export the current table view
as comma separated values (CSV format) that can be saved, or viewed in
MS Excel. Creates a snapshot of the listed requirement specifications.
A file download form will prompt you to open or save the file. Choosing
open displays an Excel file with the table data.
This icon is used to export the current table view
as comma separated values (CSV format) that can be saved, or viewed in
MS Excel. Creates a snapshot of the listed requirement specifications.
A file download form will prompt you to open or save the file. Choosing
open displays an Excel file with the table data.
![]()
Printer Friendly
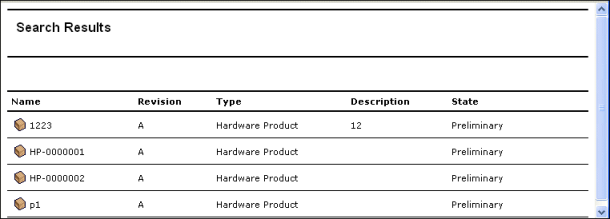
![]() Creates a printer friendly version of
the page in a new window. This is a sample of a typical printer friendly
page.
Creates a printer friendly version of
the page in a new window. This is a sample of a typical printer friendly
page.
![]()
Multi Column Sorting
![]() ,
, ![]() , Choose this option if you need to sort
a listing by more than one column of data. You can use the Sort page,
shown here, to sort up to three data items in ascending or descending
order.
, Choose this option if you need to sort
a listing by more than one column of data. You can use the Sort page,
shown here, to sort up to three data items in ascending or descending
order.
![]()
Mass Promote
![]() Promotes the selected objects to the next level in
the lifecycle. There are five levels: Preliminary, Draft, Review, Release,
and Obsolete. Mass Promote requires either object manager or owner level
authorization. An error report will open to confirm the number of objects
successfully promoted or demoted.
Promotes the selected objects to the next level in
the lifecycle. There are five levels: Preliminary, Draft, Review, Release,
and Obsolete. Mass Promote requires either object manager or owner level
authorization. An error report will open to confirm the number of objects
successfully promoted or demoted.
![]()
Mass Demote
![]() Demotes the selected objects to the previous level
Demotes the selected objects to the previous level
in the lifecycle. There are five levels: Preliminary, Draft, Review, Release, and Obsolete. Mass Demote requires either object manager or owner level authorization. An error report confirms the number of objects successfully promoted or demoted.