Setting Preferences

This section describes how to set preferences and modify default attributes for the server.

The System Administrator uses the Preferences page to set preferences and modify the default value of attributes for the server. This section describes the various preferences and their available options.

Note: In order for preference changes to take effect, you must re-login to ENOVIA from the Integration Exchange Client or from SolidWorks to start a new session of Designer Central.

To set preferences:

  1. In the ENOVIA Global toolbar, click ENOVIA > Actions > Preferences.

  2. Click the SolidWorks tab.

    You can set the following preferences for CheckIn:

    Copy Relationship Attributes--Select this option to copy the Relationship attributes upon checkin by default.

    Use Bulk Loading--Select this option to use bulk loading for checkin by default.

    You can set the following preferences for Checkout:

    Copy Relationship Attributes --Select this option to Copy the Relationship Attributes by default during Checkout.

    Related View Registry --Select your choice of related views registry here.

    User Directory Alias Mode --Select the user directory alias mode to allow the DL Names or aliases for the directory from the options:


    • not allowed--the DLNames are not allowed and displayed.
    • allowed--the DLNames and the other directories are displayed when you browse to select a location for checkout.
    • current--only the DLNames are displayed when you browse to select a location for checkout.

    Default Vertical View. Select a view from the drop down list to set the default vertical view as RelatedDrawing or RelatedCGRDerivedOutput. Select None to prevent application of Vertical views by default.

    Default Lateral View. Select a view from the drop down list to set the default lateral view as LatestVersion, LatestRevision or AsStored.

    You can set the following Miscellaneous preferences:

    Select Children if parent is selected--Select this option to select the child components by default when a parent node is selected.

    Use Zip in File Operations--Select this option to enable zip compression for file transactions in ENOVIA.

    Progressive Loading--Select this option to enable progressive loading.

    Default Expand Level--Enter a number to set the number of levels of expansion of design structures by default.

    Default Folder--Click [...] to open the Choose Workspace page. Select a workspace and click OK to set it as the default workspace folder.

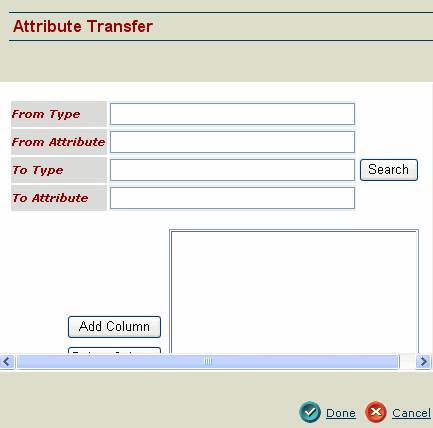
    Object Attribute Transfer for EBOM--This is used for selective object attribute transfers from CAD Model to Part. Use the following steps to set attribute transfer for objects during EBOM.

    1. Click Click Here to open the Attribute Transfer page.


    2. Enter the following:

      From Type. Enter a valid integration type.

      From Attribute. Enter a valid ENOVIA attribute.

      To Type. Click Search to search and select an Engineering part type.

      To Attribute. Enter the name of the attribute of the engineering part.

    3. Click Add Column to add the specified mapping.

      If the mapping is invalid, an error message displays.

      Relationship Attribute Transfer for EBOM--This is used for selective relationship attribute transfers from CAD Model to Part. Use the following steps to set attribute transfer for objects during EBOM.

    4. Click Click Here to open the Attribute Transfer page.


    5. Enter the following

      From Type. Enter a valid ENOVIA type.

      From Attribute. Enter a valid ENOVIA attribute.

      To Type. Click Search to search and select an Engineering part type.

      To Attribute. Enter the name of the attribute of the engineering part.

    6. Click Add Column to add the specified mapping. If the mapping is invalid, an error message displays.

      The Derived Output Generation section in the Preferences page lists all the Derived Output types, listed in the SolidWorksInteg-Global Config Object, with check boxes. The selected types from this list are shown pre-selected during Checkin.

      Select the Derived Output types by selecting the checkbox under Automatic or Manual columns from the list. The following Derived Output types are supported by ENOVIA Collaborative Design for SolidWorks:


      • cgr
      • image_jpg
      • pdf

      Default Type Policy Settings

      Select the policy set for the CAD type by the administrator in the Default Type Policy Settings. The administrator can enforce/default a policy for a particular Type.

      Selected Default Tables

      Set the default table to be applied to the list of ENOVIA Designer Central pages in the Preferences page. Select the default table you want to apply to the appropriate pages in ENOVIA Designer Central from the drop down list of workspace tables displayed.

      Selected Default Webforms

      From the drop down list, select the default webform to be applied to the Open and Properties pages of ENOVIA Designer Central.

      For details on setting Global preferences, see ENOVIA Designer Central User Guide.

  3. Click Update to apply the selected preference settings or click Close to close the Preferences page.