Adding a Product Task | |||
| |||
To add or insert tasks, select the needed options from the page Actions menu or toolbar:
Insert Task Above - Adds a task on the same level as the selected task, as a sibling task.
Add Subtask Below - Adds a child task to the selected task.
Note: If you are not a Project Lead, you can add only subtasks to your assigned tasks. You cannot add siblings tasks for your assigned tasks.
Add New Task form opens where you can provide the following information:
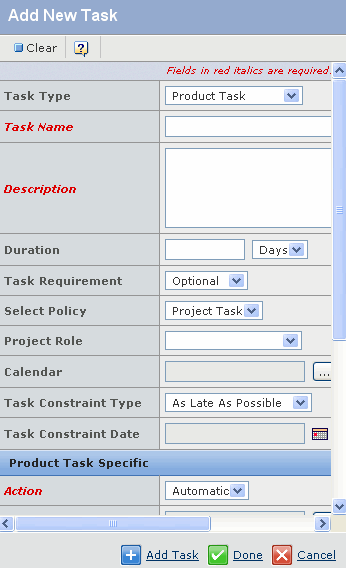
Field Name How to Enter Task Type Select the type from the drop-down list. You can choose Task, Gate, Phase or Milestone. Task Name The name must be unique and is limited to 30 alphanumeric characters. Description A brief description of the task. Must be alphanumeric characters. Duration An estimate of the task length. The duration must be less than 10,000 days. Enter a number (can include a decimal value) and select units, days or hours, from the drop-down list. Task Requirement Indicate whether this is an optional or mandatory task. The system's default behavior requires all tasks, even optional ones, to be completed before the project can be completed. Select Policy Select from the list of policies for the selected task type (there may be only one policy). Project Role From the list of existing project roles, choose the role responsible for completing this task. Project members having the selected role display in the Assignees list below. When the page initially loads, the Project Role pull-down is blank by default and all the members of the current project are listed in the Assignees column. When a project is created from a project template, the project role is copied from the template WBS tasks to that of the created projects. Action Select an action from the drop down list to create a product task specific to the selected action. Product Type Click  and select the specific type of product you want to
create.
and select the specific type of product you want to
create.Applicable To Applicable to can have values: - New and Revised Products
- New Products
- Revision Products
Event Select this attribute to select the event that can be performed on a product which will trigger the update. The values that this attribute can have are: - Modify Attribute - Select Modify Attribute from the drop down list to modify selected attribute. The product task is completed when the attribute is modified with the specified value.
- Promote - Select Promote from the drop-down list to promote a product task to specified lifecycle state. The task is completed when the product task attains the specified lifecycle state.
- Connect - The connect options lists the relationships that are associated with a Style.
For example: If a style is connected to a Measurement chart or Sample Request or 'Sketch', the drop down lists the relationships that connect the style to these object types. Attribute Select 'Modify Attribute' from the Event drop-down to display this field. Select Product option from the drop-down list to display attributes related to type product. Value The values selected in this drop-down depend upon the action selected in the first step. - Set the event to Modify Attribute.
- If the attribute selected contains range values, the field is a drop-down listing available ranges.
- If the attribute selected does not have any range values, the field is a text box.
- If the event is set to Connect, the field is a multi-select drop-down listing all types that can be connected to the product.
Assignees The Assignees list is displayed only when inserting/adding tasks for a Project Space or Project Concept. From the list of potential assignees for the task, based on the Project Role selected, set these items. Owner Select to make the task assignee the owner of the task. Only one assignee can be the owner. If you do not choose this option, you become the owner but are not included in the assignees list. Assignee From the list of persons in the project role selected, choose the person(s) you want to assign this task to. You do not have to assign the task now. After creating the task, an assignee from outside the project can be added. Name The name of the assignee is displayed. Task Allocation The percentage of that person's time allocated for completing the task allocated to the assignee.