Select the check box of a Product Line.
In the tab toolbar, select Product Actions > Create Product Master.
The Create New Product Master page appears.
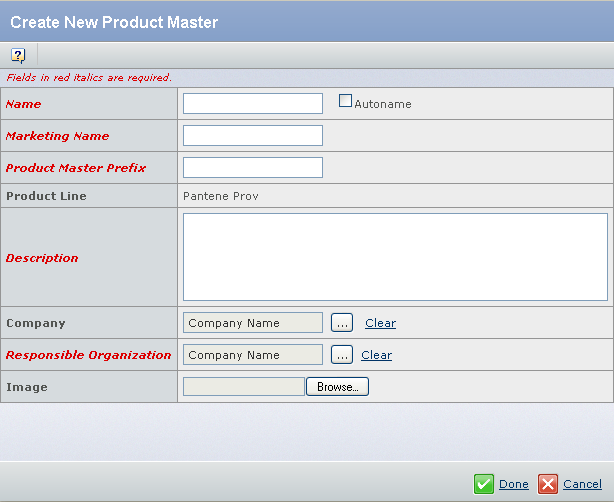
Enter the following details about the Product Master.
Fields in red and italics are mandatory attributes. - In the Name box, type the name of the new Product Master.
You can also select the check box for Autoname to automatically assign a name. Special Characters are not permitted.
- The Marketing Name is automatically populated with the same value as the Name box.
You can either accept the default name or specify a different name.
- In the Product Master Prefix box, type the prefix for the Product Master.
You can use alphanumeric characters. Use only uppercase letters. Any lowercase letters are automatically converted to uppercase. The maximum length of the prefix is determined by a property setting.
- In the Description box, type the description for the new Product Master.
- Click
 corresponding to the Company, to assign a company or business unit to relate to the new Product Master. corresponding to the Company, to assign a company or business unit to relate to the new Product Master.By default, the Company Name is set as your company.
- Click corresponding to the Responsible Organization, to assign an organization or project that has design responsibility for the Product Master.
- Click Browse to select an image for the Product Master.
Click Done.
Note:
When you create a Product Master, a Product of type CPG Product is automatically created under the new Product Master.
The Product Master gets created.
|