From the global toolbar, click ,
and then click Metrics Dashboard.
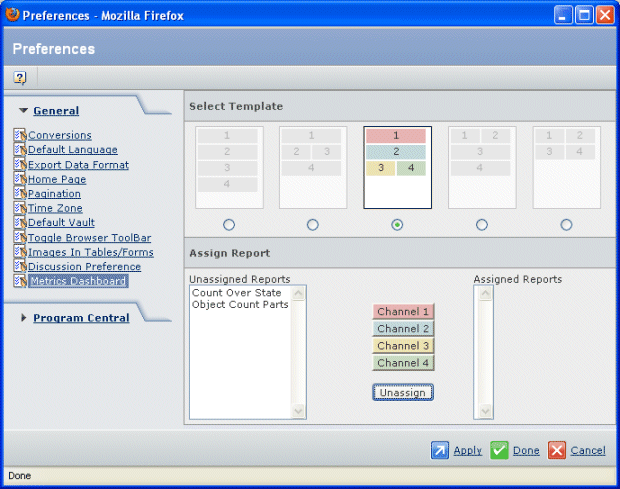
Channels 1 to 4 indicate the Channel number as shown in the
selected template.
In the Select Template section, click the option button for the template
layout you want to use.
Select a report name in the Unassigned Reports list (saved reports that
have not yet been assigned to a channel).You control the tab order of
the reports by assigning the reports to the channels in the same order
you want them to display in the dashboard.
Click the Channel button where you want to view that report. The selected
report is added to that channel and displays in the Assigned Reports
list box.
Continue adding reports to channels until you have assigned all the
unassigned reports.
If you try to add more than the allowed number of reports to a wide
channel, you will see this message: "4 Reports per channel limit reached".
If you try to add more than the allowed number of reports to a narrow
channel you will see this message: "2 Reports per channel limit reached".
To remove a report from the assigned list, click the report then click
Unassign.
Click Apply to save your changes and leave the
Preferences page open so you can set other preferences.
Or
Click Done to save your changes and close the
Preferences page.