In the page toolbar, click .
The Routes page may be part of a Lifecycle/Review PowerView.
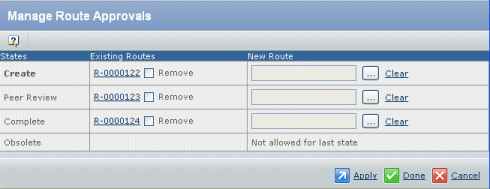
From the Routes page Actions menu or toolbar, click Manage
Route Approvals. The Manage Route Approvals page for the
object opens, listing all currently configured routes for each state.

The current state of the objects shows in bold. For more details about
a route, click its name.
To add a new route:
-
Click
 for the needed state. The Find Route Template
page opens. for the needed state. The Find Route Template
page opens.
-
Enter a Name and Availability. See Selecting a Template for a Route.
-
Click Find. The Select Route Template opens,
listing the available templates.
-
Select the needed route template. You can only select a single template.
-
Click Submit.
To remove an existing route, click its check box.
Click Apply to save the changes and keep the
page open; click Done to save the changes and
close the window.
If you added a route to the object's current states, it starts automatically
when you click Apply or Done.
If you removed a route, all tasks for that route are deleted.
|