Importing Existing Data to ENOVIA V6 | ||||||
|
| |||||
Launch ENOVIA V6 Import Utility tool using CATIA Batch Monitor.
Windows:
UNIX:
In the Document Selection area, click
 to open the File Selection dialog box.
See "Running Batches" section in the Infrastructure User's Guide for details on using CATIA Batch Monitor .
Note: It is recommended to load the pointed documents for each assembly while processing the top level document for import. Selecting the pointed documents for individual import increases the overall processing time. The final result in case of selecting all pointed documents or selecting just the top level documents for import is the same.
Select the All option to choose all the files in a specified directory for import. Each of these files are treated as the root document and the utility checks in each document and it's pointed documents one by one.
It is recommended that the following options are not used in Input Options section in File Selection dialog box to avoid unnecessary processing and reporting:
- Select pointed documents. This option is unnecessary because the import utility will follow the links anyway.
- All option with or without "Extend selection to sub directories. This option selects all eligible documents present in a directory and its sub-directories if Extend selection to sub directories option is selected. The import utility follows links even if they point to files in another directory. This option is only useful if the directory and/or subdirectory contains documents which are not pointed by one of the already selected documents. It is recommended to avoid selecting a whole directory/subdirectory and select only the root documents of the assembly to import.
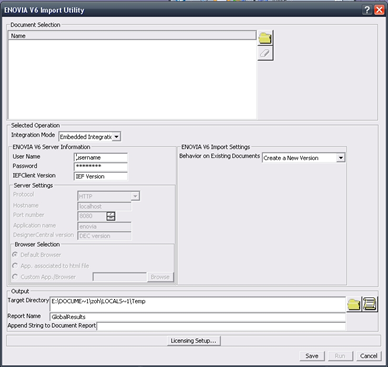
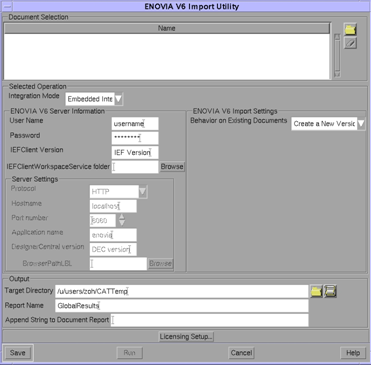
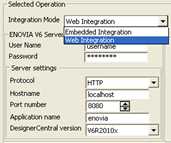
In the Selected Operation area, use the following steps to enter values for the parameters in the ENOVIA V6 Server Information:
Windows:
UNIX:
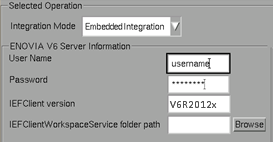
Note: Parameters vary according to the platform and the selected Integration Mode.
In the Output area, enter values for the following parameters:
Target Directory: Click
to browse and select a location where the report files of the import in htm format is saved.Report Name: Enter a name for the report.
Append String to Document Report: Enter a string. The value is appended to the file name of the generated htm report file.
Click Run to start the import process.
Note: Run is not deactivated during the execution of a process. Clicking Run multiple times duplicates the processes. Running multiple processes simultaneously might cause issues for import in ENOVIA. The status of objects in ENOVIA might be unreliable because of simultaneous imports.
A silent applet of the server url opens in the browser and the import process starts in the background.
Note: This browser window must not be closed when the batch process is running.
The following window opens when the import process is in progress.
Once the import process is complete, this window closes automatically and a report is generated and saved at the location entered as the Target Directory.
Note:
- The browser must be closed once the import process is complete.
- Only one import process should be run at a time.
- Incase of an import failure, the changes are not rolled back. The documents that are saved to ENOVIA before failure of the process will be retained.
- Only pre-selected Derived Outputs in the preferences are considered. Derived Outputs cannot be modified for each object. You can set the derived outputs from the Preferences page.
Click
 to open the output report in the browser.