Editing Defect Action Details

While working on a Defect Action, you may need to edit some of the fields, such as adding notes, related affected items, or promoting it to fixed.

Note: This procedure only lists those fields that you can edit on this page. For details on all fields on this page, see Viewing Defect Action Details.

  1. Perform one of these procedures:

    1. View the Properties page for the Defect Action. See Viewing Defect Action Details.
    2. From the page Actions menu or toolbar, click Edit Details.

    Or:

    1. View any page that lists Defect Actions. See Managing Defect Actions.
    2. Click Edit in the row for the needed Defect Action.
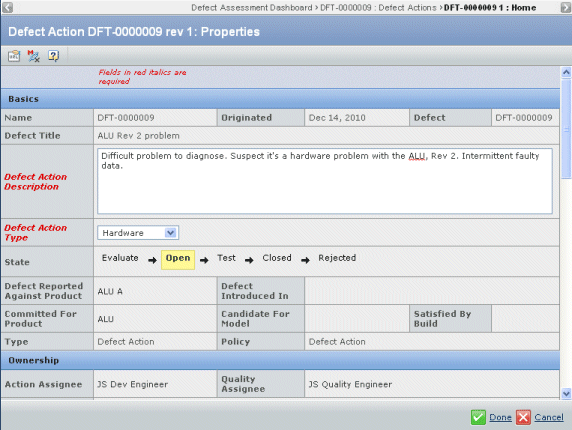

    Edit Properties

  2. Edit any of these details:

    Basics

    • Defect Action Description. A detailed description of the Defect Action.
    • Defect Action Type. Select an option from the drop-down list.
      • Software
      • Hardware
      • Documentation
      • Test

    Ownership

    • Subscribers. The people to be notified whenever a change is made to this Defect Action. Click the ellipsis button to open a search page for people.

    Defect Action Details

    • Resolution. Select an option from the drop-down list that indicates how the Defect Action is resolved:
      • Code Change.
      • Design Change.
      • Documentation Change.
      • N/A
      • Test Change.
      • Waiver.
      • Workaround.
    • Cause. Select an option from the drop-down list that indicates what caused the Defect:
      • Always been there.
      • Bad bug fix.
      • Business Reason.
      • Configuration.
      • Context Handling.
      • Other.
    • Where Found. Select an option from the drop-down list that indicates where the Defect was found:
      • Netlist
      • Hardware
      • Software
      • Other
    • Notes. Use this field to enter discussion notes about the Defect Action.


      Notes

      Click Public Reply (anyone with access to the defect can view the Notes) or Private Reply (only those users from your organization can view the Notes).

  3. Click Done.