Clearing Captures

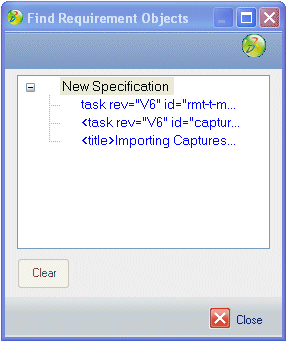
Use this procedure to locate and clear a new capture from an MS Word specification document. The Find icon on the Requirement Capture toolbar opens a tree view of all pending and imported captures. Blue text identifies a new capture. Imported captures are shown in black text. Capture objects appear as follows:

1) Chapter title appears as the highlighted or selected heading name or the first 25 characters of body text. If no body text exists, then New Chapter appears. 2) Requirements appear as the first 25 characters of selected text. If no text exists, then New Requirement appears. 3) Comments appear as the first 25 characters of selected text. If no text exists, then New Comment appears.


Before you begin:

Requirement Capture must be installed. For instructions, see Installing ENOVIA Requirement for Word.

Open the requirement specification document in MS Word.

  1. From the Requirement Capture toolbar, click (Find).


  2. In the listing, click the capture you want to clear.

    The document scrolls to the selected capture. It appears as white text on a black background.

  3. Verify the capture, and then click Clear.

    The capture is removed from the Find listing and the document.

    Clearing a Chapter will not clear any of the captures in that Chapter.

  4. Click Close.