Running the XPGClientBatch from Batch Monitor | ||
| ||
Select Tools > Utility... to access the Batch Monitor.

Double-click XPGClientBatch.
To transfer the authoring visualization data (CGR), select Light Representation checkbox.
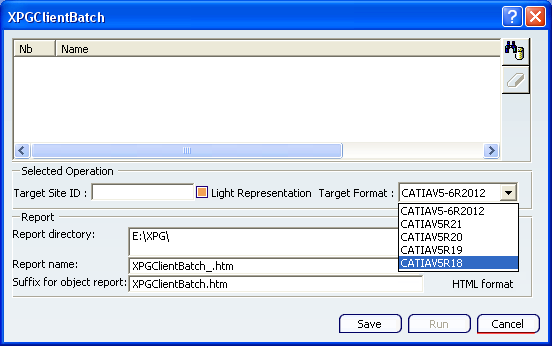
The visualization representation data (CGR) is extracted from V6 database and transferred to X-PDM. While transferring, the extracted CGRV6 gets converted to the specific CGR V5 level as per the selected Target Format.( For example: CATIAV5R20)
Note:
- While exporting from V6 to X-PDM with the Light Representation option, if no CGR is present in V6 but an authoring representation is available, no representation is transferred.
- Either V6 authoring or authoring visualization representations are exported from V6. Export of both V6 authoring and authoring visualization at the same time is not possible.
- When you export a V6 Product Structure including Drawing Representations to X-PDM with the Light Representation option, the drawing data gets suppressed in the transition and only the design data is converted into CGR.
To transfer the authoring data (exact geometry), clear the Light Representation checkbox. Select the Target Format, in which you would like to extract 3D exact geometry format to exchange.
- Select CATIAVxxx formats, if you want to exchange in CATPart format.
- Or select STEP format, if the X-PDM system is using other CAD tool.
Or select another CAD format displayed in the list. The availability of other CAD formats depends upon your setup.
Note: If you select a target format other than V5,
- If the product has any authoring visualization representation, it does not get translated.
The Drafting Target Format list appears which enables you to select the desired V5 level of drawing.

In Report directory
- Enter the directory path, where the report should get saved.
- Or click Browse
 , to navigate through the file tree in order to select a desired directory.
Report directory option is mandatory and is initialized with the current or temporary directory by default.
Click Search
 , to open the Search dialog box.
For detailed information about running queries and output naming options, please refer to Searching for Objects in XPGClientBatch User Interface
Important: - Only one object can be selected at a time for processing by XPGClientBatch.
Only certain types such as Product, persistent filter or drawings are eligible for transfer.
To know which types of objects are supported, please refer to
Installation and Configuration | ENOVIA | Unified Live Collaboration | X-PDM Gateway - Installation | Data Exchange mechanisms | Export
Optional: Click Erase
 to keep only one object in the list.
To launch the batch, click Run.
When the conversion is over, the XPGClientBatch batch generates:
- A quick result information accessible through the Processes tab.
- A detailed HTML report saved in the directory specified in the Report directory .
To display the light version of the global results, access the Processes tab and double-click the batch execution line.
These results indicate if each of the selected objects has been processed or not along with the result (success or failure).
