Editing a Defect's Details | ||
| ||
Follow one of these procedures:
- View the Properties page for a Defect. See Viewing Defect Details.
- From the page Actions menu or toolbar, click Edit Details.
Or:
- View any page that lists Defects. See Managing Defects
- Click
 in the row for the needed Defect.

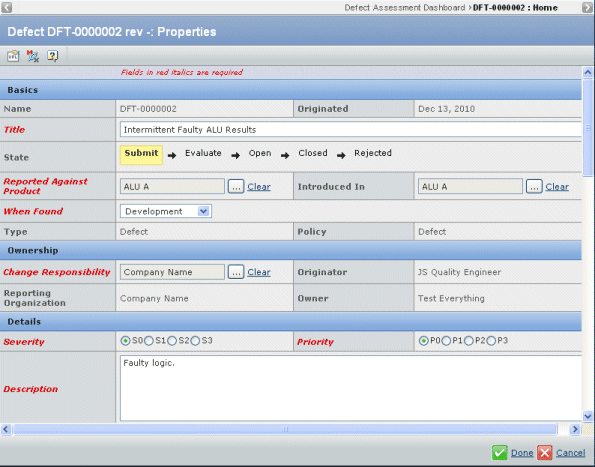
Edit any of these details (for details about fields that cannot be edited, see Viewing Defect Details):
Basics
- Title. Enter a title that briefly defines the defect.
- Reported Against Product. Click the ellipsis button to search for and select the Product that the Defect affects. If you started this procedure from a Product's properties page or from an Issue, the relevant Product is automatically listed here.
- Introduced In. Click the ellipsis button to select the Product, revision where the defect was first found.
- When Found. Select an option from the drop-down menu to indicate the stage of the product development process where the Defect was discovered:
- Development
- First Pass Test
- Second Pass Test
- Final Qualification
- After Release
- N/A
Ownership
- Change Responsibility. By default, shows the organization with the Design Responsibility for the Product, or the parent Model of the object. Click the ellipsis button to select a different organization responsible for resolving the defect.
Details
- Severity. Click the option that indicates how severe the Defect is, where S0 is a showstopper and S3 is the least severe.
- Priority. Click the option that indicates the priority for fixing this Defect, where P0 means the highest priority and P3 is the lowest priority.
- Description. Enter a detailed description of the Defect.
- Steps to Reproduce. Enter a step-by-step procedure showing exactly how to reproduce the Defect.
- Environment. Click the ellipsis button to select the environment (client and server operating systems, browsers, and so on) in use when the Defect was discovered.
Summary
- Regression. Click Yes or No.
- Regression From. If Regression is Yes, click the ellipsis button to select the Product revision where the feature last worked.
- Regression Details. Enter a detailed description of the change that broke the relevant feature.
- Notes. Use this field to contain discussion notes about the Defect or attach a document.
Click Public Reply (anyone with access to the defect can view the Notes) or Private Reply (only those users from your organization can view the Notes).
- Subscribers. Click the ellipsis button to select people who should be notified whenever a change is made to this Defect.
- Keywords. Enter a list of terms relevant to this Defect that people can use when searching for Defects.
Click Done.