Select a context logical feature for the split and replace.
Note:
The context feature must be in the Preliminary state.
From the page Actions
menu or toolbar or right-click the logical feature, click Split and Replace.
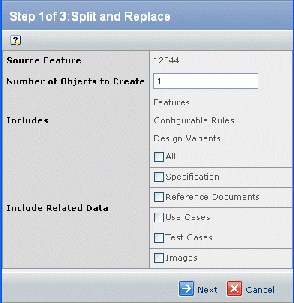
The Split and Replace page opens.

Make modifications, as necessary. The following can be changed:
Number of Objects to Create. Type the number
of instances to create of the context feature.
Include Related Data. Select the type of data
from the context feature to include for the new instances. Select one
or more options from the list.
Click Next.
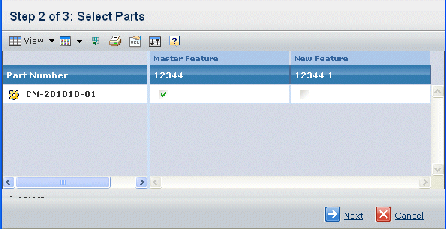
The Select Parts page opens.

The table contains the following columns:
Part Number. The part number of the part related
to the feature.
New Features columns. The new instances for the context feature. The
name of each new instance is automatically created by adding the instance
number to the name of the context feature. By default all the parts are
not selected.
Design Variants columns. The design variants and the design conditions
for the parts.
Select the parts to include for each of the instances.
A part can be included for more than one feature. Each feature must
include at least one part. Each part must be included for at least one
feature.
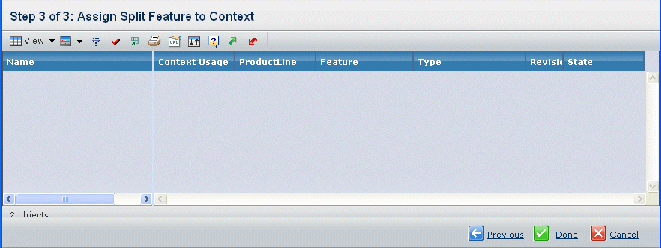
Click Done. The Assign Split Feature to Products
page opens.

For each product, select a feature from the drop-down menu. The list
includes the context feature and all the new instances.
Click Done.
Note:
If the logical feature definition has any context-specific Common Groups, they are not replicated on the split features. You must manually recreate the context-specific Common Groups on the split features.