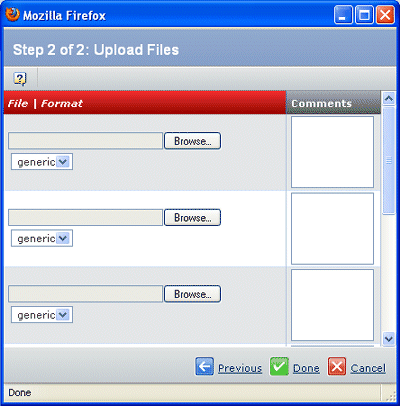
Initiate the create, upload, or checkin process. This screen shows the
page for uploading files to a Common Document Model object:
This screen shows the page for uploading a file for a DesignSync document:
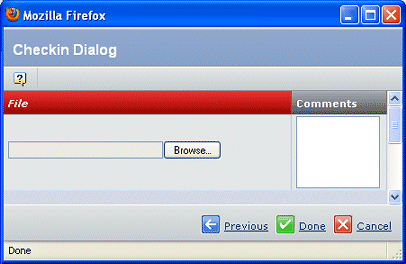
Click Browse and navigate to the file you want
to check in. For common documents, repeat for each file you want to check
in.
Note:
When creating documents for Program Central objects such as deliverables or attachments, you are not required to check in a file now. You can upload a file to the document later.
For common documents, select the format from the drop-down menu.
You cannot checkin the same filename (that is, 2 files with the same
name and file extension) to different formats. If you do, the second
file checked in becomes the next version of that file, even if it is
checked into a different format that the first file.
Type any Comments about each file.
Click Done.
When uploading to a DesignSync document, the file or the folder you
selected is checked into the DesignSync server and an ENOVIA business
object is created to contain the metadata needed to access that file
or folder. During checkin of a folder, the compressed file is expanded
and its contents are placed in the DesignSync server. A combination of
factors like the folder information provided in the DesignSync server,
the Path, and the folders within the compressed file determine how the
contents of the compressed file are unpacked in the server. When you
checkin a file, the file is connected to the newly-created business object.
When you checkin a folder, the DesignSync folder (not the folder that
you uploaded) is connected to the newly-created business object.
|