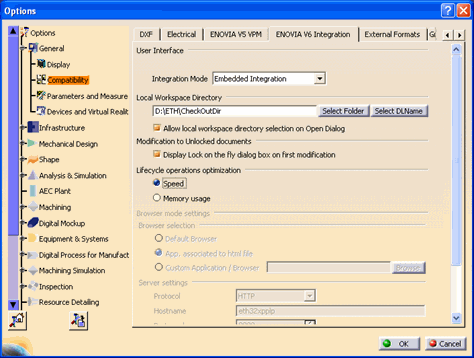
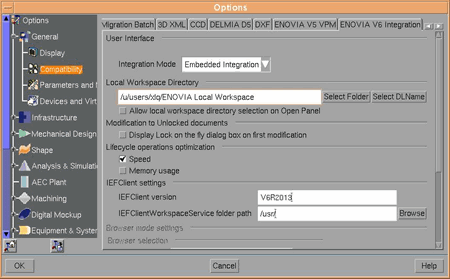
| User Interface |
Integration Mode |
Select Embedded Integration from the drop down list to activate the integration and enable Embedded Integration. Note:
Once Embedded Integration is enabled, all functions from the browser UI are disabled.
|
| Local Workspace Directory |
Select Folder or Select DLNames |
Click Select Folder or Select DLName to browse and set the default folder. See Setting the Local Workspace Directory for Open. |
| Allow local workspace directory selection on Open Dialog |
Select to activate the option that allows you to select the local workspace directory in the Open dialog box. Note:
This option is not selected by default.
|
| Modification to Unlocked Documents |
Display Lock on the fly dialog box on first modification |
Select to activate a confirmation dialog box that allows you to lock documents whenever any documents that is not locked, or is locked by another user is modified by you. See Enabling Lock on the Fly. |
| Lifecycle operations optimization |
Speed and Memory usage |
The options in this section affect both Native and Browser UI. |
| IEF Client Settings Note:
This section is valid only for UNIX platforms.
|
IEFClientVersion |
Enter the version of IEF Client that is used. For example, V6R2013. |
| IEFClientWorkspaceService folder path |
Click Browse and specify the installation directory of IEF Client Workspace Service. |