Uploading Files with the Applet | |||
| |||
Initiate the create, upload, or checkin process.
You cannot use the applet to update files that were checked out; you can only use the applet to initially create or checkin files.
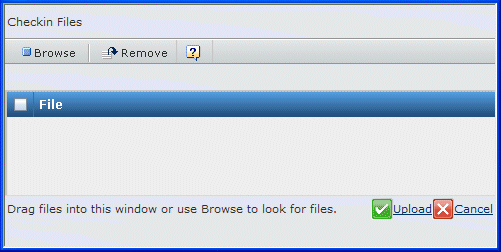
Use one of these methods to select files to upload:
- Click Browse. Select the file(s) you want from the file navigator dialog.
- Drag and drop: open Windows Explorer or another file navigation window. Select one or more files from the file navigation window and drag them to the Files page. The window turns pink when you can drop the files.
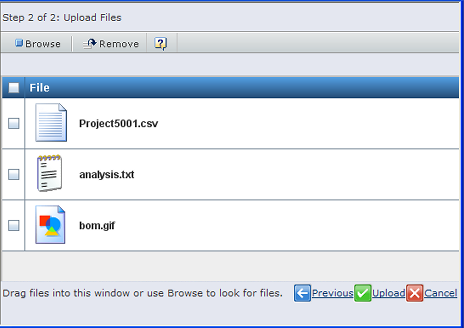
The file names appear in the list.
To add a checkin comment, click
 at the end of a row.
 The page adds a text box where you can enter comments.
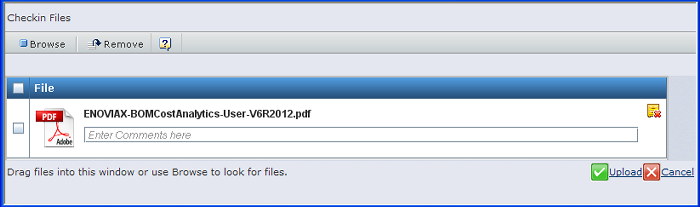
You can click
 to remove the comment box.
Click Upload.
A progress bar shows for each file as it is uploaded. Click
 to halt the upload process. Halting the process stops the complete upload for ALL files in the list.